Window Paint Removal: Easy DIY Tips You Need to Know!

Is unsightly paint clouding your view? Understanding the right tools, such as a reliable scraper, is crucial when considering how do you remove paint from windows. The process often involves softening the paint with heat guns or chemical strippers, depending on the type of paint. DIY enthusiasts, like those often featured on home improvement programs, regularly tackle this task, finding satisfaction in restoring windows to their original clarity. With the right approach, even stubborn paint can be safely and effectively removed, revealing sparkling clean windows.
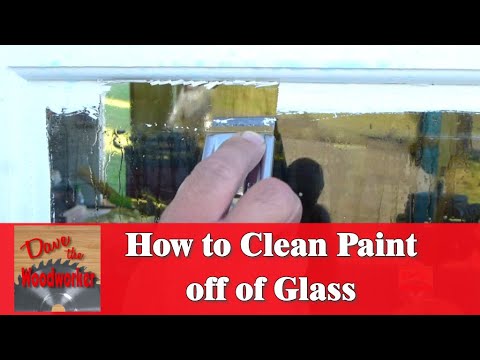
Image taken from the YouTube channel Dave the Woodworker , from the video titled How to clean/remove paint from glass windows .
Reclaim Your View: DIY Paint Removal for Sparkling Windows!
That unwanted splatter of paint marring your otherwise pristine window isn’t just an eyesore. It’s a barrier, obscuring the natural light and diminishing the beauty of your home.
Many homeowners resign themselves to living with these imperfections, unaware that a crystal-clear view is within their reach. The solution? DIY paint removal.
The Problem of Paint on Windows
It happens to the best of us. A stray brushstroke, a careless roller, and suddenly your windows are adorned with unwanted paint.
Whether it's a fresh coat gone astray or years of accumulated splatters, paint on windows detracts from your home's appearance and can even reduce its value.
More than just an aesthetic issue, paint obstructs natural light, impacting the ambiance of your living spaces.
The Importance of Clear Windows
Consider the difference a clean, clear window makes.
Sunlight streams in, illuminating your rooms and creating a warm, inviting atmosphere.
Aesthetics are dramatically improved, both inside and out. Your home looks brighter, more cheerful, and well-maintained.
Improved curb appeal can even translate into a higher property value. Don't underestimate the power of a sparkling first impression!
DIY Paint Removal: An Achievable Goal
The good news is that reclaiming your view is entirely possible with a bit of elbow grease and the right knowledge.
DIY paint removal isn't an overwhelming task. With the proper techniques, tools, and a dose of patience, you can achieve professional-looking results.
This guide will equip you with the necessary information to tackle this project confidently.
We will cover everything from identifying the type of paint to choosing the appropriate removal method, ensuring a safe and effective process.
Get ready to transform your windows from dull and obstructed to dazzling and clear.
DIY paint removal, as you can see, is an achievable and rewarding goal. But before you charge headfirst into scraping and scrubbing, there's a crucial step: identifying the type of paint you're dealing with. Think of it as knowing your enemy before heading into battle – it will greatly influence the tools and strategies you employ for a successful outcome.
Know Your Enemy: Identifying the Type of Paint on Your Windows
Why is identifying the paint type so critical? Simply put, different paints react differently to various removal methods. What works wonders on latex paint might be completely ineffective, or even damaging, on oil-based paint. Understanding the composition of the paint will guide you toward the most efficient and safest approach.
Common Paint Types on Windows
Let's delve into the three most common paint types you're likely to encounter on your windows:
- Latex Paint: This is the most common type, known for its water-based composition, durability, and ease of cleanup.
- Oil-Based Paint: These paints are prized for their hard, glossy finish. They are known for their durability and resistance to moisture.
- Acrylic Paint: These paints are also water-based. They offer excellent color retention and flexibility.
Cracking the Code: Identifying the Paint Type
Fortunately, you don't need a chemistry lab to determine the type of paint on your windows. Here are some simple tests and visual clues that can help you make an informed decision:
The Alcohol Rub Test
This is a straightforward and effective method:
- Dampen a cotton ball with rubbing alcohol (isopropyl alcohol).
- Rub the cotton ball vigorously on a small, inconspicuous area of the painted surface.
-
Observe the results:
- If the paint softens, becomes tacky, or begins to come off, it's likely latex paint.
- If the paint remains largely unaffected, it's likely oil-based paint.
The Visual Inspection
Sometimes, a close look is all you need:
- Age: Older homes often have oil-based paint, while newer constructions are more likely to use latex.
- Sheen: Oil-based paints typically have a higher gloss or sheen than latex paints.
- Cracking: Over time, oil-based paints tend to become brittle and develop hairline cracks.
- Smell: If you sand a small area of the paint, oil-based paints often have a distinct, solvent-like odor.
By employing these simple investigative techniques, you'll be well-equipped to identify the paint type on your windows. This knowledge will be your compass, guiding you toward the most effective removal methods and saving you time, effort, and potential frustration.
Know Your Enemy: Identifying the Type of Paint on Your Windows is half the battle, but even the most skilled warrior needs the right equipment. Before you even think about tackling that stubborn paint, it's time to assemble your arsenal. Having the correct tools not only makes the job easier and more efficient but also dramatically improves your chances of achieving a clean, damage-free finish.
Gather Your Arsenal: Essential Tools and Materials for Safe Paint Removal
Think of this stage as preparing for a mission. A well-stocked toolkit ensures you're ready for any challenge the paint throws your way. We're not just talking about the basics; we're talking about having everything you need within arm's reach, from the right scraper to the appropriate safety gear.
The Comprehensive Checklist
Here's a rundown of the essential items you'll want to have on hand:
- Razor Blade Scraper: Crucial for precision work. Make sure you have a good supply of replacement blades for a consistently sharp edge. A dull blade is more likely to scratch the glass.
- Putty Knife: Ideal for gently prying away larger paint flakes and for applying putty or filler if needed. Choose one with a flexible blade for better control.
- Cleaning Solutions: A variety is helpful. Start with mild soap and water, but also have stronger options like mineral spirits or specialized paint removers on hand.
- Soft Cloths: Microfiber cloths are your best bet. They won't leave lint or scratch the glass. Have plenty available for wiping, cleaning, and polishing.
- Drop Cloths: An absolute must for protecting your floors and furniture. Canvas drop cloths are durable and reusable, but plastic sheeting also works well.
- Painter's Tape: Essential for creating clean lines and protecting the window frame. Use a high-quality tape that won't leave residue behind.
- Window Cleaner: For the final touch – that sparkling, crystal-clear finish. Choose a streak-free formula for the best results.
Safety First: Gearing Up for Battle
Paint removal can involve some potentially hazardous materials and sharp tools. Protecting yourself is paramount.
- Safety Glasses: Absolutely non-negotiable. Protect your eyes from flying paint chips and chemical splashes.
- Gloves: Choose chemical-resistant gloves to protect your skin from solvents and irritants. Nitrile or latex gloves are good options.
- Respirator/Mask: Depending on the paint removal method you choose (especially if using chemical strippers), a respirator or mask might be necessary to protect your lungs from harmful fumes. Read the product labels carefully and follow the manufacturer's recommendations.
Breathing Easy: The Importance of Ventilation
Many paint removal products release fumes that can be harmful if inhaled. Good ventilation is crucial for a safe and comfortable working environment.
- Open Windows: Whenever possible, open windows and doors to create a cross-breeze.
- Use a Fan: Place a fan in the room to circulate air and help dissipate fumes.
- Work Outdoors: If possible, remove the window sash and work outdoors in a well-ventilated area.
By taking the time to gather your tools and prioritize safety, you're setting yourself up for a successful and rewarding paint removal experience. This preparation stage is just as important as the actual removal process, so don't skip it!
Techniques for Removing Paint: A Step-by-Step Guide
With your tools assembled and your workspace prepped, it's time to face the paint head-on. The good news is you have options. From meticulous scraping to the power of chemistry, several methods can effectively remove paint from glass. Let's explore these techniques, focusing on safety, effectiveness, and choosing the right approach for your specific situation.
The Razor Blade Technique: Precision and Patience
The razor blade scraper is often the first line of defense, especially for relatively thin layers of dried paint. When wielded with care, it can deliver surprisingly clean results without scratching the glass.
Mastering the Angle and Pressure
The key to success with a razor blade scraper lies in maintaining the correct angle.
Hold the scraper at a shallow angle, approximately 15-30 degrees, to the glass surface.
Apply gentle, consistent pressure. Avoid pressing too hard, as this can increase the risk of scratching. Let the sharpness of the blade do the work.
It's better to make multiple light passes than to try and remove all the paint in one go.
Step-by-Step Demonstration of Paint Removal
-
Prepare the Blade: Ensure your razor blade is new and sharp. A dull blade is more likely to slip and scratch.
-
Lubricate the Area (Optional): For particularly stubborn paint, lightly mist the area with a window cleaner or soapy water. This can help the blade glide more smoothly.
-
Scrape with Precision: Using a smooth, controlled motion, glide the razor blade across the paint, maintaining the shallow angle.
-
Wipe Away Residue: As you scrape, periodically wipe away the removed paint residue with a soft cloth.
-
Repeat as Needed: Continue scraping and wiping until all the paint is removed.
Patience is crucial here. Rushing the process can lead to mistakes and potential damage.
Heat It Up! When and How to Use a Heat Gun Safely
A heat gun can be a valuable tool for softening stubborn paint, making it easier to scrape away. However, it's essential to use it cautiously, as excessive heat can damage the glass, especially on older or tempered windows.
Knowing When to Use (and Avoid) a Heat Gun
-
Suitable Scenarios: Heat guns work best on oil-based paints and thicker layers of dried paint.
-
When to Avoid: Avoid using heat guns on tempered glass, as it can cause it to shatter. Exercise extreme caution around window frames, especially older wood that might be dry or brittle. Direct heat can cause it to warp or even catch fire.
The Proper Heat Gun Technique
-
Set the Heat Gun to Low: Start with the lowest heat setting and gradually increase it as needed.
-
Maintain Distance: Hold the heat gun several inches away from the glass surface.
-
Move in a Sweeping Motion: Never hold the heat gun in one spot for too long. Keep it moving in a slow, sweeping motion to distribute the heat evenly.
-
Test a Small Area: Before applying heat to the entire painted area, test a small, inconspicuous spot to ensure the glass can withstand the heat.
-
Scrape While Warm: As the paint softens, immediately scrape it away with a putty knife or razor blade scraper.
Crucial Cautions
-
Overheating: Overheating is the biggest risk with a heat gun. Pay close attention to the glass and surrounding materials. If you notice any signs of warping, cracking, or scorching, immediately stop applying heat.
-
Ventilation: Work in a well-ventilated area, as heating paint can release fumes.
-
Fire Hazard: Keep a fire extinguisher nearby and be extra careful around flammable materials.
Chemical Warfare: Choosing and Using Paint Strippers Effectively
Chemical paint strippers offer a powerful solution for removing paint, especially when dealing with multiple layers or particularly stubborn coatings. However, they require careful handling and the right product selection.
Choosing the Right Chemical Paint Stripper
-
Identify the Paint Type: As emphasized earlier, knowing the type of paint you're dealing with is crucial. Different strippers are formulated for different types of paint (latex, oil-based, acrylic).
-
Read the Labels: Carefully read the product labels to ensure the stripper is compatible with your paint and safe for use on glass.
-
Consider VOCs: Opt for low-VOC (volatile organic compound) strippers whenever possible to minimize fumes and environmental impact.
Safe and Effective Application
-
Protective Gear is Essential: Always wear gloves and eye protection when working with chemical paint strippers. A respirator is also recommended for prolonged use or in poorly ventilated areas.
-
Apply Generously: Apply a thick, even layer of stripper to the painted area, following the manufacturer's instructions.
-
Allow Dwell Time: Let the stripper dwell for the recommended time, allowing it to penetrate and soften the paint.
-
Scrape Away the Softened Paint: Use a putty knife to scrape away the softened paint.
-
Neutralize and Clean: After removing the paint, neutralize the surface according to the stripper manufacturer's instructions. Thoroughly clean the window with soap and water to remove any remaining residue.
Natural Alternatives: Eco-Friendly Paint Removal with Vinegar and Baking Soda
For those seeking a more environmentally friendly approach, natural paint removers like vinegar and baking soda offer a gentler, albeit potentially slower, alternative.
How Natural Paint Removers Work
Vinegar and baking soda work by softening and loosening the paint's bond with the glass surface.
-
Vinegar: The acetic acid in vinegar helps to break down the paint's adhesive properties.
-
Baking Soda: Baking soda acts as a mild abrasive, helping to lift the softened paint.
Recipes and Instructions
-
Vinegar Soak: Soak a cloth in white vinegar and apply it to the painted area. Let it sit for several hours or overnight, then scrape away the softened paint.
-
Baking Soda Paste: Mix baking soda with water to create a thick paste. Apply the paste to the painted area and let it dry completely. Then, gently scrape away the paste and softened paint.
-
Vinegar and Baking Soda Combination: Create a paste with baking soda and white vinegar. Apply to the painted area and let sit for 30 mins and gently scrape the paint away.
Eco-Friendly Benefits and Suitability
Natural paint removers are non-toxic, biodegradable, and generally safer to use than chemical strippers. They are best suited for removing thin layers of paint or for softening paint before using another method. They may not be as effective on thick or heavily bonded paint.
Regardless of the technique you choose, remember that patience and careful execution are key to achieving a clean, damage-free finish.
Prepping for Success: Protecting Your Workspace and Windows
Before even thinking about wielding a scraper or applying a solvent, a crucial step often overlooked is preparing your workspace. Proper preparation isn't just about keeping things tidy; it's an investment in saving time, preventing damage, and ultimately achieving a professional-looking result. The key lies in two essential tools: drop cloths and painter's tape. These unsung heroes of DIY projects act as a shield, guarding your home from the inevitable mess of paint removal.
Drop Cloths: Your First Line of Defense
Imagine tackling a paint removal project without drop cloths. Paint chips, stray solvent drips, and general grime would quickly find their way onto your flooring, furniture, and anything else in the vicinity. Cleaning up such a mess could easily double the project's duration and cause unnecessary stress.
Drop cloths are designed to prevent such disasters, acting as a barrier between your workspace and potential damage. They are available in various materials, each with its own set of benefits:
-
Canvas Drop Cloths: These are the champions of durability and reusability. While they may be slightly more expensive upfront, their longevity and ability to absorb spills make them a worthwhile investment for frequent DIYers.
-
Plastic Drop Cloths: A more affordable option, plastic drop cloths offer waterproof protection. They are ideal for catching liquid spills and are easy to clean. However, they can be slippery and may not be as durable as canvas.
-
Paper Drop Cloths: For a disposable option, paper drop cloths are lightweight and convenient. They are best suited for smaller projects with minimal mess.
When selecting a drop cloth, consider the size of your workspace and the potential for spills. It's always better to err on the side of caution and choose a larger drop cloth than you think you need. Ensure it fully covers the area beneath the window and extends far enough to catch any falling debris. Secure the edges with tape to prevent it from shifting during the project.
Painter's Tape: Creating Clean Lines and Protecting Surfaces
Painter's tape is another indispensable tool for protecting your window frames and surrounding surfaces. Its primary function is to create clean lines and prevent paint remover from accidentally reaching areas you don't want to treat.
-
Choosing the Right Tape: Not all painter's tape is created equal. For delicate surfaces, opt for a low-tack tape that won't damage the finish. For more robust protection, a standard painter's tape will suffice.
-
Applying the Tape: The key to effective taping is careful application. Start by cleaning the surface you intend to tape with a damp cloth and allowing it to dry completely. This ensures proper adhesion. Apply the tape in smooth, even strips, pressing firmly along the edges to create a tight seal.
-
Sealing the Deal: For added protection, consider running a putty knife or credit card along the edge of the tape to further seal it against the surface. This helps prevent paint remover from seeping underneath.
Remember to remove the painter's tape promptly after you've finished removing the paint. Leaving it on for extended periods can cause the adhesive to harden, making it difficult to remove and potentially damaging the surface. By taking the time to properly tape off your window frame, you'll ensure a clean, professional-looking result and avoid unnecessary touch-ups.
The Synergy of Protection
Drop cloths and painter's tape are most effective when used in tandem. The drop cloth shields the surrounding floor and furniture from drips and debris, while the painter's tape precisely protects the window frame. By diligently preparing your workspace with these two tools, you're setting the stage for a successful and stress-free paint removal project. It's a small investment of time that yields significant returns in terms of reduced cleanup, damage prevention, and a more polished final product.
Prepping your workspace and windows sets the stage, but the real performance begins now: removing the paint without leaving a mark. The following steps require patience, a gentle touch, and the right techniques to coax the unwanted paint away, revealing the sparkling glass beneath.
Glass Act: Carefully Removing Paint From the Window Panes
The moment of truth arrives: tackling the paint directly on your window panes. This stage demands a delicate approach. The goal is to remove the offending paint without etching, scratching, or otherwise damaging the glass surface. Patience is your greatest asset here. Avoid rushing, as haste can lead to mistakes and potential damage.
Gentle Application of Cleaning Solutions
Often, the first line of attack involves softening the paint further with a suitable cleaning solution. But which solution is best, and how should it be applied?
-
Choosing Your Weapon: The ideal solution depends on the type of paint and the method you're using. For instance, after using a heat gun, a simple window cleaner might suffice to remove softened residue. After using chemical paint strippers, specialized neutralizers are necessary. For natural methods like vinegar, a diluted vinegar solution can aid in the cleanup process.
-
Spot Test is Key: Before applying any solution liberally, conduct a spot test in an inconspicuous area of the window. This ensures the solution doesn't react negatively with the glass or any remaining paint.
-
Application Technique: Dampen (don't saturate) a soft cloth with your chosen cleaning solution. Gently dab the affected area, allowing the solution to sit for a minute or two to loosen the paint's grip. Avoid excessive rubbing at this stage, as it could potentially scratch the glass.
The Power of Soft Cloths: Buffing Your Way to Perfection
Once the cleaning solution has had a chance to work its magic, the real polishing work begins, and this is where the humble soft cloth truly shines.
-
Material Matters: Opt for microfiber cloths or lint-free cotton cloths. These materials are gentle on glass and won't leave behind unwanted fibers or streaks. Avoid abrasive materials like paper towels, which can scratch the surface.
-
Technique is Everything: Use a circular motion with light pressure to buff away the softened paint. Regularly inspect the cloth for any paint residue that might scratch the glass. Replace the cloth or use a clean section as needed.
-
Persistence Pays Off: You may need to repeat the cleaning solution application and buffing process multiple times, especially for stubborn paint. Don't be discouraged; slow, steady progress is better than aggressive tactics that could damage the glass.
-
Razor Blade Assistance (When Needed): In some cases, a razor blade scraper might still be necessary for particularly stubborn spots. However, exercise extreme caution. Ensure the blade is new and sharp and use it at a shallow angle. Apply minimal pressure, and always keep the blade clean. If you are not comfortable using a razor blade scraper, continue gentle cleaning and polishing, or seek professional assistance.
By combining the gentle application of cleaning solutions with the careful use of soft cloths, you can effectively remove paint from your window panes. Achieving that crystal-clear view without causing damage to the glass requires the proper application of gentle methods.
Prepping your workspace and windows sets the stage, but the real performance begins now: removing the paint without leaving a mark. The following steps require patience, a gentle touch, and the right techniques to coax the unwanted paint away, revealing the sparkling glass beneath.
Finishing Touches: Cleaning and Polishing for a Crystal-Clear View
Removing the bulk of the paint is a victory, but the battle isn't over until your windows are truly gleaming. Often, a faint haze or stubborn streaks remain, testaments to the paint's tenacious grip. Addressing these final imperfections is crucial to achieving that crystal-clear view you've worked so hard for.
Banishing Lingering Residue
Even after the most careful scraping or chemical treatment, a thin film of paint residue can cling to the glass. This residue dulls the shine and obscures clarity.
Identifying the type of residue is the first step. Is it a greasy film from a chemical stripper? Or a chalky haze from dried paint?
The appropriate removal method depends on the nature of the residue.
Tackling Different Types of Residue
-
Greasy Films: For greasy residues left by paint strippers, dish soap is surprisingly effective. Mix a few drops of dish soap with warm water and use a soft cloth to gently wash the entire window pane. Follow with a clean water rinse and dry thoroughly.
-
Chalky Haze: A chalky residue often yields to a slightly abrasive cleaner. A paste of baking soda and water, gently rubbed onto the glass, can lift the haze. Be sure to rinse thoroughly to remove all traces of baking soda.
-
Stubborn Streaks: For persistent streaks, try a dedicated glass cleaner containing ammonia. The ammonia helps to dissolve and lift stubborn residue.
The Power of a Clean Wipe
The secret to streak-free windows lies in the drying process. Avoid using paper towels, which can leave lint behind.
Instead, opt for microfiber cloths or a squeegee. Microfiber cloths trap dirt and residue effectively. Squeegees, when used correctly, leave a perfectly smooth and streak-free surface.
Perfecting Your Wiping Technique
-
Microfiber Cloths: Use a clean, dry microfiber cloth to buff the window after cleaning. Fold the cloth into quarters, using a fresh section for each wipe.
-
Squeegee Mastery: Overlap each stroke of the squeegee by a small amount to ensure complete coverage. Wipe the squeegee blade clean after each stroke to prevent redepositing residue.
The Grand Finale: Window Cleaner Application
Once the residue is gone, it's time for the final flourish: a generous application of your favorite window cleaner.
Choose a high-quality window cleaner that is specifically designed for glass. These cleaners contain ingredients that dissolve dirt and grime, leaving a sparkling shine.
Application Tips for Maximum Sparkle
-
Even Coverage: Spray the window cleaner evenly across the entire surface of the glass. Avoid oversaturation, which can lead to drips and streaks.
-
Immediate Wiping: Wipe the window immediately after applying the cleaner. Allowing the cleaner to dry on the glass can cause streaks.
With these final steps, your windows will transform from dull and paint-splattered to brilliantly clear. Stand back, admire your work, and enjoy the unobstructed view!
Often, the best lessons are learned the hard way. After meticulously removing paint from your windows, you’re likely keen on preventing a repeat performance. Luckily, proactive measures during future painting projects can save you considerable time and effort. These preventative steps, though simple, are the key to maintaining your hard-earned, sparkling-clean windows.
Prevention is Key: Mastering Paint Application to Protect Your Windows
The most effective way to keep paint off your windows is to prevent it from getting there in the first place. Diligence and preparation are your greatest allies. Thoughtful application techniques will minimize splatters and stray brushstrokes, ensuring your windows remain pristine during your next painting endeavor.
The Art of Careful Painting
The foundation of paint-free windows lies in deliberate painting practices. This doesn't require advanced artistic skills, but rather a mindful approach to each brushstroke.
-
Load your brush appropriately: Avoid overloading your brush with paint. Excess paint is far more likely to drip or splatter. Dip only the bottom third of the bristles into the paint, and gently tap off any excess against the side of the can.
-
Control your speed: Painting too quickly increases the likelihood of splatters. Maintain a slow, steady pace, allowing for greater control over the paint flow.
-
Work in manageable sections: Focus on small areas at a time. This provides better control and reduces the risk of mistakes.
-
Maintain a wet edge: This technique helps to avoid lap marks and ensures a smooth, even coat. Always overlap slightly with the previous section before it dries.
The Indispensable Role of Painter's Tape
Painter’s tape is your first line of defense against errant paint. When applied correctly, it creates a crisp, clean line, protecting your window glass from unwanted color.
Choosing the Right Tape
Not all painter's tape is created equal. Consider the following factors when selecting your tape:
-
Surface sensitivity: Delicate surfaces require a low-tack tape to prevent damage upon removal.
-
Project duration: Longer projects require tape with greater UV resistance to prevent adhesive breakdown.
-
Paint type: Some tapes are specifically designed for use with certain types of paint (e.g., latex or oil-based).
The Secret to a Seamless Seal
Proper application is crucial for painter's tape to effectively block paint. A poorly applied tape job is almost as bad as no tape at all.
-
Clean the surface: Before applying tape, ensure the window frame is clean and dry. Dust and debris can prevent the tape from adhering properly.
-
Apply with pressure: Press the tape firmly against the frame, ensuring a tight seal. Use a putty knife or a taping tool to smooth out any air bubbles or wrinkles.
-
Overlap tape ends: When joining two pieces of tape, overlap them slightly to prevent paint from seeping through the seam.
-
Remove tape promptly: Once the paint is dry to the touch, carefully remove the tape at a 45-degree angle. Waiting too long can cause the tape to adhere more strongly, potentially pulling off paint or leaving behind residue.
By incorporating these tips into your painting routine, you can significantly reduce the chances of future paint mishaps on your windows. Remember, a little prevention goes a long way in preserving your view and saving you time and effort in the long run.
Video: Window Paint Removal: Easy DIY Tips You Need to Know!

FAQs About Window Paint Removal
Window paint removal can seem daunting, but with the right techniques, it’s manageable! Here are some frequently asked questions to help guide you:
Is scraping always necessary for window paint removal?
Not always. While scraping is often effective for removing stubborn, thick layers of paint, you might be able to avoid it with heat guns or chemical solvents, depending on the paint type and how well it adheres to the glass. Consider the age of the paint, and experiment to see what works best.
What kind of scraper should I use to remove paint from windows?
Use a specialized window scraper designed for glass. These usually have replaceable razor blades and a comfortable handle. Hold the scraper at a shallow angle and use even pressure to avoid scratching the glass. Always use a new, sharp blade for the best results.
How do you remove paint from windows without damaging the glass?
Gentle methods are key. First, soften the paint with a heat gun (keeping it moving) or a suitable paint remover. Then, carefully scrape with a window scraper or use a soft cloth to wipe away the softened paint. Avoid excessive force, which could scratch or break the window. Clean the glass thoroughly afterward.
Are there any specific safety precautions I should take during window paint removal?
Absolutely. Wear safety glasses to protect your eyes from paint chips. Use gloves to protect your hands from chemicals and sharp scrapers. If using a heat gun, be careful not to overheat the glass or nearby flammable materials. Ensure proper ventilation if you're using solvents.