HardieBacker Shower Install: Avoid Costly Mistakes!

The longevity of your beautifully tiled shower relies heavily on a properly installed backer board. Incorrect installation can lead to costly water damage and the headache of redoing the entire project. To avoid these common pitfalls, understanding how to install HardieBacker board in shower is crucial. This guide provides a detailed walkthrough, highlighting critical techniques recommended by experts at James Hardie. Also, you'll see the importance of using the correct thin-set mortar. We will provide the methods to install to meet ANSI standards and ensure a waterproof and long-lasting shower.

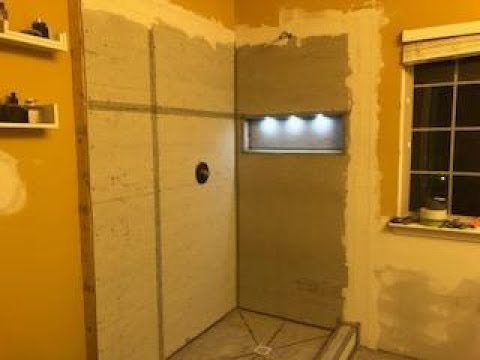
Image taken from the YouTube channel craftsmanconnection , from the video titled How to Install HardieBacker Cement Board in a Bathtub Shower for beginners. Time and Materials Cost. .
HardieBacker Shower Install: Avoid Costly Mistakes!
Installing HardieBacker cement board in your shower is a crucial step for creating a waterproof and long-lasting shower enclosure. A proper installation prevents water damage, mold growth, and costly repairs down the road. This guide will walk you through the process, highlighting common pitfalls to avoid and offering step-by-step instructions for successful HardieBacker installation.
Planning and Preparation: Setting Yourself Up for Success
Before you even pick up a piece of HardieBacker, careful planning and preparation are key. This ensures you have everything you need and understand the nuances of your particular shower space.
Gathering Your Tools and Materials
Having the right tools and materials on hand makes the installation process much smoother. Here's a comprehensive list:
- HardieBacker Cement Board: Calculate the amount needed based on your shower dimensions. It's always a good idea to buy a little extra to account for cuts and waste.
- HardieBacker Screws: These are specifically designed for cement board and resist corrosion. Choose the correct length based on the thickness of your HardieBacker and framing.
- Cement Board Seam Tape: Alkaline-resistant mesh tape is essential for reinforcing seams and preventing cracks.
- Thin-Set Mortar: Modified thin-set mortar is needed for setting the HardieBacker and filling the seams.
- Waterproofing Membrane (Optional but Recommended): Consider a topical waterproofing membrane like RedGard or Hydro Ban for added protection, especially in areas prone to high moisture.
- Measuring Tape: For accurate measurements and cutting.
- Utility Knife: With replaceable blades for scoring and cutting the HardieBacker.
- Straight Edge or T-Square: To guide your cuts.
- Drill or Impact Driver: For driving the HardieBacker screws.
- Mixing Bucket and Paddle: For mixing the thin-set mortar.
- Notched Trowel: For applying thin-set mortar (size depends on HardieBacker manufacturer's recommendations and the size of the tile).
- Safety Glasses: Protect your eyes from dust and debris.
- Dust Mask or Respirator: Cement board dust can be harmful to your lungs.
- Gloves: To protect your hands.
- Level: To ensure the HardieBacker is installed plumb and level.
Assessing Your Shower Framing
Inspect your shower framing carefully. The framing needs to be sturdy and plumb to provide a solid foundation for the HardieBacker.
- Check for Plumb and Level: Use a level to verify that the studs are plumb and level. Shim where necessary to correct any imperfections.
- Ensure Proper Spacing: Studs should be spaced no more than 16 inches on center. If spacing is greater, you may need to add additional framing.
- Inspect for Rot or Damage: Replace any rotted or damaged framing before installing the HardieBacker.
- Consider Backing at Fixture Locations: Add extra blocking to the studs where shower fixtures (shower head, valve, etc.) will be installed.
Calculating HardieBacker Board Dimensions
Accurate measurements are essential for minimizing waste and ensuring a professional finish.
- Measure Shower Walls: Measure the height and width of each shower wall.
- Account for Overlap: Overlap sheets where possible to minimize cuts and make the seams easier to tape.
- Plan for Cuts Around Fixtures: Mark the locations of shower fixtures on the HardieBacker before cutting.
Installing HardieBacker: Step-by-Step Guide
Now that you've prepared your space and gathered your materials, it's time to install the HardieBacker.
Cutting HardieBacker
Cement board can be cut using various methods. Here’s the "score and snap" method which is the most common for DIYers.
- Measure and Mark: Accurately measure and mark the cut line on the HardieBacker using a measuring tape and straight edge.
- Score the Board: Use a utility knife and straight edge to score the HardieBacker along the marked line. Score deeply, making several passes.
- Snap the Board: Place the scored HardieBacker over a sawhorse or other raised surface with the scored line facing up. Apply pressure on both sides of the score line until the board snaps.
- Smooth the Edges: Use a utility knife or rasp to smooth any rough edges.
Applying Thin-Set Mortar
Thin-set mortar provides a bond between the framing and the HardieBacker, adding strength and preventing movement.
- Mix the Mortar: Mix the thin-set mortar according to the manufacturer's instructions. Aim for a peanut butter-like consistency.
- Apply Mortar to Studs: Using a notched trowel, apply a generous layer of thin-set mortar to the studs. Apply even pressure and use the correct notch size for optimal coverage.
- Work in Small Sections: Avoid applying mortar to too large an area at once, as it can dry out before you can set the HardieBacker.
Fastening HardieBacker to Framing
Securing the HardieBacker to the studs is crucial for a stable and long-lasting installation.
- Position the Board: Carefully position the HardieBacker board against the framing, ensuring it's flush with adjacent boards.
- Install Screws: Use HardieBacker screws to fasten the board to the studs. Space the screws approximately 8 inches apart along the edges and 12 inches apart in the field (center) of the board.
- Countersink Screws: Drive the screws so they are flush with the surface of the HardieBacker, or slightly countersunk. Avoid over-tightening, which can strip the screws.
Taping and Mudding the Seams
Taping and mudding the seams creates a smooth and waterproof surface for tiling.
- Apply Thin-Set to Seams: Use a 4" or 6" taping knife to apply thin-set mortar into the HardieBacker seam and around the screw heads.
- Embed Seam Tape: Press alkaline-resistant mesh tape into the wet thin-set, ensuring it is fully embedded.
- Apply Second Coat: Once the first coat of thin-set is dry, apply a second, thin coat of thin-set over the seam tape, feathering the edges to create a smooth transition.
- Let Dry Completely: Allow the thin-set to dry completely before proceeding with waterproofing or tiling. Usually 24-48 hours, depending on the product and humidity.
Waterproofing: Taking Extra Precautions
While HardieBacker is water-resistant, it's not completely waterproof. Adding a waterproofing membrane is highly recommended, especially in areas prone to direct water exposure, such as the shower walls and floor.
Applying a Topical Waterproofing Membrane (RedGard, Hydro Ban, etc.)
Topical waterproofing membranes are easy to apply and provide excellent protection.
- Clean the Surface: Ensure the HardieBacker surface is clean, dry, and free of dust and debris.
- Apply the Membrane: Apply the waterproofing membrane according to the manufacturer's instructions, typically using a brush, roller, or trowel. Apply two coats, allowing each coat to dry completely before applying the next.
- Pay Attention to Corners and Seams: Pay extra attention to corners, seams, and penetrations (pipes, shower heads, etc.) to ensure complete coverage.
- Allow to Cure: Allow the waterproofing membrane to fully cure before tiling, following the manufacturer's recommendations.
Common Mistakes to Avoid
Avoid these common mistakes for a successful and long-lasting installation:
- Using the Wrong Screws: Using drywall screws or other inappropriate fasteners can lead to corrosion and failure. Always use HardieBacker screws.
- Over-Tightening Screws: Over-tightening screws can strip the screws and damage the HardieBacker.
- Skipping the Thin-Set Mortar: Applying HardieBacker directly to the studs without thin-set mortar weakens the installation and increases the risk of movement and cracking.
- Using the Wrong Thin-Set: Use a modified thin-set mortar that is designed for cement board.
- Neglecting Waterproofing: Even though HardieBacker is water-resistant, it's not waterproof. Always consider using a waterproofing membrane for added protection.
- Ignoring Framing Issues: Installing HardieBacker over uneven or weak framing can lead to problems down the road. Ensure the framing is solid and plumb before starting.
- Poor Seam Treatment: Improperly taped and mudded seams can lead to cracks and water intrusion. Pay close attention to this step.
Video: HardieBacker Shower Install: Avoid Costly Mistakes!
HardieBacker Shower Install: Frequently Asked Questions
Have questions about installing HardieBacker in your shower? Here are some common concerns addressed to help you avoid costly mistakes.
What type of thin-set mortar should I use when installing HardieBacker board in shower applications?
You absolutely must use a modified thin-set mortar specifically designed for cement board. These mortars contain polymers that enhance bonding strength and water resistance, crucial for shower environments. Using the wrong type of mortar can lead to the HardieBacker detaching, causing tile failure and water damage.
How much of a gap should I leave between HardieBacker boards during installation?
Leave a consistent 1/8-inch gap between all HardieBacker boards. This gap allows for expansion and contraction due to temperature and humidity changes, preventing stress cracks and ensuring a more durable installation. Fill these gaps with thin-set mortar.
What screws should I use to install HardieBacker board in shower?
Use corrosion-resistant screws specifically designed for cement board. These screws are typically coated to prevent rust and degradation in a moist environment. The correct length is vital – it should penetrate the studs at least 1 inch. Regular drywall screws are not suitable and will corrode, compromising the integrity of how to install HardieBacker board in shower.
Can I install HardieBacker directly over drywall in my shower?
No, never install HardieBacker directly over drywall in a shower. Drywall is not designed to withstand moisture and will quickly deteriorate, causing the HardieBacker and tile to fail. Always remove the existing drywall and install HardieBacker directly onto the studs for a waterproof and long-lasting shower enclosure. You should check your local building codes for any variances.