Hang Curtains Like a Pro: Apartment Edition!

Apartment living presents unique decorating challenges, and finding the right window treatments can be key. One crucial aspect involves choosing the right hardware, as the type of wall and window frame will greatly influence your options. The ultimate goal? To learn how to hang curtains in an apartment successfully and enhance your living space. Understanding basic DIY skills is advantageous. A good starting point is to know what type of curtains best suit your needs so you can achieve privacy, style, and light control in your apartment. With the proper know-how and a bit of planning, achieving a professionally styled window treatment is within reach.
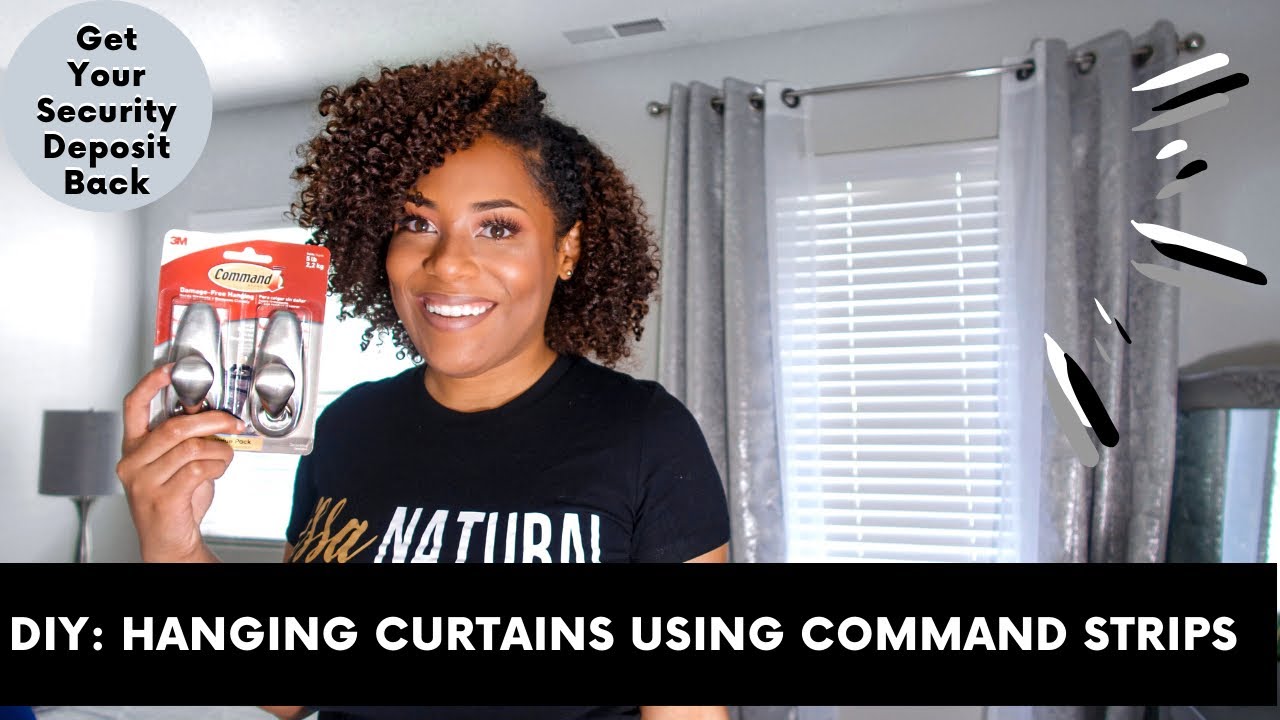
Image taken from the YouTube channel Lia Lavon , from the video titled HOW TO HANG CURTAINS WITH COMMAND HOOKS| NO HOLES OR TOOLS| APARTMENT FRIENDLY .
Welcome! Imagine stepping into a space where the sunlight streams just so, where privacy is a given, and where your personal style shines through. Curtains aren't merely window coverings; they're transformative elements that can redefine an apartment's ambiance and functionality.
However, hanging curtains in a rental comes with its own set of hurdles. Concerns about damaging walls, navigating lease restrictions, and finding solutions that respect the property's condition can quickly turn a decorating dream into a stressful endeavor.
This guide is your comprehensive resource for navigating these challenges and achieving perfectly hung curtains in your apartment. We'll equip you with the knowledge and techniques to confidently enhance your living space without compromising your rental agreement or causing lasting damage.
The Power of Curtains: Aesthetics and Functionality
Curtains offer a multifaceted approach to interior design, blending aesthetic appeal with practical benefits. They can dramatically alter the feel of a room, making it feel cozier, more spacious, or more sophisticated.
Beyond aesthetics, curtains serve essential functions:
-
Privacy: Curtains provide a shield from prying eyes, ensuring your personal space remains private.
-
Light Control: From blackout curtains that create a serene, dark environment for sleep to sheer curtains that softly filter sunlight, the right curtains allow you to control the amount of light entering your apartment.
-
Style and Décor: Curtains are a powerful design element, adding color, texture, and pattern to your living space. They can complement your existing décor or serve as a focal point, reflecting your unique personality.
Apartment Living: Unique Challenges
While the desire for stylish and functional curtains is universal, apartment dwellers face specific limitations. Rental agreements often restrict modifications to the property, and the fear of incurring charges for damages can deter tenants from hanging anything at all.
Key challenges include:
-
Rental Restrictions: Leases often dictate whether drilling is permitted, and even when it is, there may be stipulations about the size and placement of holes.
-
Potential for Damage: Improper installation can lead to damaged walls, which can result in deductions from your security deposit.
-
Finding Solutions: Finding suitable solutions that balance aesthetics with practicality and respect rental agreements requires careful consideration.
Your Guide to Curtain Hanging Success
This blog aims to empower you with the expertise to overcome these challenges. We'll provide detailed, step-by-step instructions, covering everything from understanding your rental agreement to choosing the right hardware and hanging curtains securely and beautifully.
Our goal is to ensure that you can confidently transform your apartment with curtains, enhancing its beauty and functionality while adhering to your rental agreement and preserving the integrity of the property.
Let's embark on this journey to create a perfectly draped apartment you'll be proud to call home!
Navigating Apartment Restrictions: Understanding Your Rental Agreement
So, you're ready to transform your apartment with beautiful curtains, building on their powerful effects? But before you even think about picking out fabric or hardware, there's a crucial first step: understanding your rental agreement. Ignoring this step can lead to avoidable headaches, unexpected fees, or even disputes with your landlord.
This isn't the most glamorous part of decorating, but it's arguably the most important when you are renting. Let's explore why reading your lease is essential, how to communicate effectively with your landlord, and what alternatives exist if drilling is off-limits.
The Rental Agreement: Your Curtain-Hanging Bible
Think of your rental agreement as the rule book for your apartment. It outlines your rights and responsibilities as a tenant, and it often contains specific clauses regarding alterations to the property.
These clauses can cover a wide range of topics, including:
-
Restrictions on drilling: Many leases explicitly prohibit drilling holes in walls, ceilings, or window frames.
-
Requirements for pre-approval: Some landlords may require you to obtain written permission before making any modifications, including hanging curtains.
-
Acceptable methods of installation: The lease might specify approved methods for hanging items, such as using adhesive hooks or tension rods.
-
Liability for damage: You may be held responsible for any damage caused by your curtain installation, including holes, scratches, or paint damage.
Carefully reviewing these sections of your lease is essential to avoid violating the terms of your tenancy. Violations can result in warnings, fines, or, in extreme cases, even eviction.
Communicating with Your Landlord: A Proactive Approach
Even if your rental agreement seems unclear, it's always best to communicate with your landlord about your curtain-hanging plans. A simple conversation can prevent misunderstandings and ensure you're both on the same page.
Here's how to approach the conversation:
-
Be polite and respectful: Start by explaining your desire to enhance the appearance and functionality of your apartment with curtains.
-
Be specific about your plans: Describe the type of curtains you want to hang, the installation method you intend to use (drilling or no-drill), and any precautions you'll take to avoid damage.
-
Address any concerns: Anticipate potential concerns your landlord might have and offer solutions. For example, if you plan to drill, assure them you'll use appropriate wall anchors and patch any holes upon move-out.
-
Get it in writing: Always obtain written confirmation of your landlord's approval, even if they initially give you verbal consent. This will protect you in case of future disputes.
No-Drill Alternatives: Stylish Solutions for Restriction-Free Decorating
If drilling is prohibited or your landlord is hesitant to allow it, don't despair. Numerous no-drill solutions offer stylish and damage-free ways to hang curtains.
Here are a few popular options:
-
Tension Rods: These rods use spring tension to stay in place within the window frame. They're ideal for lightweight curtains and sheer fabrics.
-
No-Drill Curtain Rods: These rods use a strong adhesive to attach to the wall above the window frame. They're suitable for slightly heavier curtains than tension rods.
-
Command Hooks: These adhesive hooks can be used to hang lightweight curtains or valances. Be sure to carefully check the weight capacity of the hooks before use.
By exploring these alternatives, you can achieve the look you want without risking damage to your apartment or violating your rental agreement. Always prioritize the long-term security of your living situation.
Choosing the Right Curtains and Hardware: A Tailored Approach
Having navigated the potential hurdles of your rental agreement, you're now free to delve into the more exciting aspects of curtain selection. This stage is about finding the perfect marriage of functionality and style, ensuring your window treatments not only meet your practical needs but also enhance your apartment's overall aesthetic.
Curtain Considerations: Light, Privacy, and Style
Selecting the ideal curtains involves carefully considering several factors. Light control, privacy, and your desired aesthetic are the primary drivers in making the right choice.
Light Control: Mastering the Glow
Different fabrics offer varying degrees of light control. Blackout curtains are ideal for bedrooms, especially for those sensitive to light or who work night shifts, as they block out virtually all incoming light.
Sheer curtains, on the other hand, allow plenty of light to filter through, creating a soft, airy ambiance. They're perfect for living rooms or dining areas where you want to maximize natural light.
Light-filtering curtains strike a balance between these two extremes, offering a moderate level of light control while still providing some privacy.
Privacy Requirements: Finding the Right Balance
Your privacy needs will also influence your curtain choice. Sheer curtains offer minimal privacy, while thicker, opaque fabrics provide more seclusion.
Consider the location of your apartment and the level of visibility from the outside. If you live on a busy street or have neighbors close by, you'll likely want to opt for curtains that offer greater privacy.
Layering curtains – for example, combining sheer curtains with heavier drapes – allows you to customize both light control and privacy levels.
Aesthetic and Décor Style: Complementing Your Space
Curtains are a powerful design element that can significantly impact the overall look and feel of your apartment. Choose curtains that complement your existing décor and reflect your personal style.
Consider the color, pattern, and texture of the curtains in relation to your furniture, walls, and other accessories. Neutral colors like white, gray, or beige are versatile and can easily blend with a variety of styles.
Bold patterns or vibrant colors can add a pop of personality to a room. The key is to choose curtains that enhance, rather than clash with, your existing décor.
Selecting the Appropriate Curtain Rod Type
The type of curtain rod you choose will depend on several factors, including your willingness to drill, the weight of your curtains, and the overall look you're trying to achieve.
Standard Rods: Classic and Sturdy
Standard curtain rods are typically mounted to the wall with brackets and require drilling. They offer the most secure and stable option for hanging heavier curtains.
No-Drill Curtain Rods: A Damage-Free Solution
No-drill curtain rods utilize tension or adhesive technology to stay in place, eliminating the need for drilling. These are ideal for renters who want to avoid damaging walls. However, they may not be suitable for very heavy curtains.
Tension Rods: Simple and Versatile
Tension rods are spring-loaded rods that fit snugly inside the window frame. They are easy to install and remove, making them a great option for renters. However, they are best suited for lightweight curtains and may not be as aesthetically pleasing as other options.
Understanding and Using Curtain Hardware
Proper hardware is essential for a successful curtain installation. Curtain rings or clips are used to attach the curtains to the rod, while wall anchors and screws are used to secure the rod brackets to the wall.
Wall anchors are particularly important when drilling into drywall, as they provide extra support and prevent the screws from pulling out. Always use the appropriate size and type of wall anchor for your specific wall type and the weight of your curtains.
Accurate Window Measurements: A Foundation for Success
Accurate window measurements are crucial for ensuring that your curtains and rods fit properly. Use a measuring tape to measure the width and height of your window frame.
For the width, measure the entire area you want the curtains to cover, extending beyond the window frame for a fuller look. For the height, measure from where you plan to mount the rod to the floor or windowsill, depending on your desired curtain length.
Write down these measurements and bring them with you when shopping for curtains and hardware. This will help you select the correct sizes and avoid costly mistakes.
No-Drill Solutions: Damage-Free Curtain Hanging Options
Having explored the realm of curtain styles and hardware, and knowing what will work best in your space, you may still be facing the dilemma of installation, particularly if drilling is off-limits. Fortunately, modern solutions offer the freedom to hang curtains without compromising your rental agreement or damaging your walls. Let's delve into the world of no-drill curtain hanging, exploring the pros, cons, and step-by-step instructions for three popular methods: no-drill curtain rods, tension rods, and Command hooks.
No-Drill Curtain Rods: The Stick-and-Stay Approach
These innovative rods offer a surprisingly sturdy solution for hanging lighter curtains without any drilling. They rely on strong adhesive pads that attach directly to your window frame or wall.
Benefits and Limitations
Benefits:
No-drill curtain rods are incredibly easy to install, requiring no tools or specialized skills. They are an excellent option for renters seeking a truly damage-free solution.
Limitations:
Their weight capacity is limited, making them unsuitable for heavy drapes or lined curtains. Also, the adhesive may not adhere well to all surfaces, particularly textured walls or surfaces with peeling paint.
Installation Guide
-
Clean the Surface: Thoroughly clean the surface where the adhesive pads will be placed with rubbing alcohol and let it dry completely. This step is critical for ensuring a strong bond.
-
Position the Brackets: Carefully position the brackets at the desired height, ensuring they are level. Use a level to double-check before removing the adhesive backing.
-
Attach the Brackets: Remove the adhesive backing and firmly press the brackets against the cleaned surface, holding them in place for the recommended time (usually 30-60 seconds).
-
Allow to Cure: Allow the adhesive to cure for the time specified by the manufacturer (usually 24-48 hours) before hanging your curtains. This allows the adhesive to reach its maximum strength.
-
Hang Your Curtains: Once cured, simply slide your curtains onto the rod and place the rod onto the installed brackets.
Tension Rods: Classic Compression
Tension rods are another renter-friendly favorite, using spring-loaded tension to stay in place within your window frame.
Benefits and Limitations
Benefits:
Tension rods are incredibly versatile and can be used in various window sizes. They are also easy to install and remove, making them ideal for temporary or frequently changing décor.
Limitations:
They are best suited for lightweight to medium-weight curtains, as heavier fabrics may cause them to slip or fall. The rod's grip can weaken over time, requiring occasional readjustment.
Installation Guide
-
Measure the Window: Measure the inside width of your window frame where you want to install the rod.
-
Adjust the Rod: Extend the tension rod slightly beyond the measured width.
-
Position the Rod: Compress the rod and fit it inside the window frame at the desired height.
-
Release and Adjust: Slowly release the rod, allowing the tension to hold it in place. Adjust the rod until it is level and secure.
-
Test the Stability: Gently tug on the rod to ensure it is firmly in place before hanging your curtains.
Command Hooks: A Versatile Alternative
Command hooks, known for their damage-free hanging capabilities, can also be used to hang lightweight curtains.
Benefits and Limitations
Benefits:
Command hooks are incredibly versatile and can be used on a variety of surfaces. They are easy to install and remove without leaving any residue.
Limitations:
Their weight capacity is the most significant limitation. They are only suitable for very lightweight curtains or valances. Surface compatibility is also crucial; they may not adhere well to textured or uneven surfaces.
Installation Guide
-
Choose the Right Hooks: Select Command hooks with an appropriate weight capacity for your curtains. Always underestimate the weight rather than overestimate.
-
Clean the Surface: Clean the surface where you will be attaching the hooks with rubbing alcohol and let it dry completely.
-
Attach the Hooks: Follow the instructions on the Command hook packaging to attach the adhesive strips to the hooks and then to the wall.
-
Allow to Cure: Allow the adhesive to cure for the recommended time (usually 1 hour) before hanging anything on the hooks.
-
Hang Your Curtains: Depending on your curtain style, you can hang them directly from the hooks using loops or by attaching curtain rings with clips to the hooks.
Weight Limit Precautions
It is imperative to meticulously follow the weight limits specified on the Command hook packaging. Exceeding these limits can lead to the hooks detaching from the wall, potentially damaging your curtains and the wall itself. Consider using multiple hooks to distribute the weight more evenly.
Having explored damage-free options, you might be wondering about the more traditional, and often more secure, approach. For heavier drapes, wider windows, or simply for peace of mind, drilling offers a robust and professional-looking solution.
Hanging Curtains with a Drill: A Secure and Professional Finish
This section provides a comprehensive, step-by-step guide to installing curtains using a drill. It emphasizes proper techniques for finding studs, using wall anchors, and ensuring a secure and level installation. While it requires a bit more effort than no-drill methods, the result is a durable and aesthetically pleasing installation that will stand the test of time.
Gathering Your Arsenal: Essential Tools for Success
Before you even think about hanging those beautiful new curtains, ensure you have all the necessary tools at your disposal. Proper preparation is key to a smooth and successful installation. Here's what you'll need:
-
Drill: A power drill is essential for creating pilot holes and securing brackets.
-
Measuring Tape: Accurate measurements are crucial for placement.
-
Level: A level guarantees a horizontal and professional-looking finish.
-
Stud Finder: This tool helps locate wall studs for maximum support.
-
Wall Anchors: Use these when studs aren't available to provide secure support in drywall.
-
Screws: Choose screws appropriate for the wall anchors and curtain rod brackets.
-
Pencil: For marking measurements and drilling locations.
Locating Wall Studs: The Foundation of a Secure Installation
Finding a wall stud will allow a direct screw to wood, eliminating the need for additional anchors, and providing the strongest and most reliable support for your curtain rod. Use a stud finder to locate the studs near your window.
If a stud finder is not available, try tapping along the wall; a solid sound usually indicates a stud. Once located, mark the stud's position with a pencil.
When Studs Are Scarce: Mastering the Art of Wall Anchors
Unfortunately, studs may not always be located where you need them. Wall anchors are your best friend in this scenario.
They provide a secure hold in drywall, allowing you to hang curtains even without stud support. Choose anchors appropriate for the weight of your curtains and follow the manufacturer's instructions for installation.
-
Selecting the Right Anchor: Different anchors have different weight capacities. Always choose an anchor that can safely support the weight of your curtains and hardware.
-
Installing the Anchor: Use the drill to create a hole matching the anchor size. Gently tap the anchor into place, ensuring it sits flush with the wall.
Precise Placement: Measuring and Marking for Perfection
Accurate measurements are essential for a balanced and aesthetically pleasing curtain installation. Measure the width of your window and determine the desired length of your curtain rod. Consider extending the rod beyond the window frame to maximize light and create a sense of spaciousness.
Using a measuring tape and level, mark the desired height and position of the curtain rod brackets on the wall. Ensure the marks are level and equidistant from the center of the window.
Drilling Pilot Holes: Preventing Wall Damage and Ensuring Accuracy
Before driving screws directly into the wall, it's often wise to drill pilot holes, particularly when working with dense materials or delicate surfaces. Pilot holes help prevent the wall from cracking or splintering and make it easier to drive the screws straight.
Use a drill bit slightly smaller than the diameter of your screws. Drill pilot holes at the marked locations, being careful to drill straight and avoid damaging the surrounding wall.
Securing the Brackets: Creating a Solid Foundation
With the pilot holes drilled (or studs located), it's time to attach the curtain rod brackets to the wall. Align the brackets with the holes (or stud marks). Insert the screws and tighten them until the brackets are securely fastened to the wall.
- Avoid Over-Tightening: Over-tightening screws can strip the holes or damage the brackets. Tighten them snugly, but avoid excessive force.
Hanging the Curtains: The Finishing Touch
Once the brackets are securely mounted, it's time for the grand finale: hanging your curtains. Thread the curtains onto the rod and carefully lift the rod into place. Position the rod so that it sits securely in the brackets.
- Even Distribution: Ensure the curtains are evenly distributed along the rod for a balanced and aesthetically pleasing look. Adjust the folds and pleats as needed to achieve the desired effect.
The Level Test: Guaranteeing a Professional Result
The final step is to double-check that the curtain rod is perfectly level. Place a level on top of the rod and adjust the brackets as needed until the bubble is centered. A level installation is crucial for a polished and professional-looking finish.
Having successfully installed your curtain rods, it's time to hang your curtains and admire your work. But what happens when things don't go quite as planned? Don't worry, even experienced DIYers encounter snags. This section provides practical solutions to common curtain-hanging problems, ensuring your window treatments look flawless.
Troubleshooting Common Curtain Hanging Problems: Solutions and Tips
Even with careful planning and execution, curtain hanging can sometimes present unforeseen challenges. Addressing these issues promptly and effectively is key to achieving a polished and professional look. Let's explore some common problems and their solutions.
Addressing Uneven Curtains: Achieving Perfect Symmetry
One of the most frustrating issues is discovering that your curtains hang unevenly after installation. This can be due to several factors, but the good news is that it's usually easily fixable.
-
Adjusting Bracket Placement: The most common cause of uneven curtains is improperly aligned brackets. Carefully remeasure the distance from the top of the window frame to each bracket. If there's a discrepancy, adjust the lower bracket accordingly. Loosen the screws, reposition the bracket, and re-secure it, ensuring it's level.
-
The Hemming Solution: If the curtains themselves are of different lengths, hemming is the best solution. If you are uncomfortable hemming yourself, take them to a tailor. A professional hemming job will ensure a clean, even finish that enhances the overall look.
-
Dealing with Minor Imperfections: For minor discrepancies, consider using adjustable curtain rings or clips. These allow you to slightly raise or lower the curtain panel to achieve a more even appearance.
Reinforcing or Replacing Failing Wall Anchors: Ensuring Stability
Wall anchors are essential for secure curtain rod installation, especially when you can't mount directly into wall studs. However, over time, or with heavy curtains, they can weaken or fail.
-
Identifying a Failing Anchor: Signs of a failing wall anchor include loose brackets, screws that won't tighten, or the anchor itself pulling out of the wall.
-
Replacing the Anchor: The best approach is to remove the old anchor and replace it with a new one of equal or greater weight capacity. Choose an anchor specifically designed for drywall or plaster, depending on your wall type. Toggle bolts are excellent for heavy curtains.
-
Reinforcing Existing Anchors: If the existing anchor is still relatively secure but showing signs of strain, you might be able to reinforce it. Consider using a larger screw or adding a second anchor nearby to distribute the weight.
-
Preventative Measures: Always use high-quality wall anchors that are appropriate for the weight of your curtains. Check the weight capacity of the anchors before installation and choose accordingly.
Curtain Rod Issues: Too Short, Too Long, or Just Plain Wrong
Selecting the right curtain rod is crucial for both functionality and aesthetics. If you've chosen a rod that's the wrong size, here's how to address the problem:
-
The Too-Short Rod: A rod that's too short can make a window look smaller and cramped. The simplest solution is to purchase a longer rod. Alternatively, consider using curtain rod connectors to join two rods together, effectively extending the length.
-
The Overly Long Rod: A rod that extends too far beyond the window frame can look awkward. If possible, cut the rod down to the desired length using a pipe cutter or hacksaw. Be sure to file down any sharp edges after cutting. If cutting isn't an option, consider returning the rod and purchasing the correct size.
-
Choosing the Right Diameter: Make sure the rod diameter is correct for your curtains. If you have grommet curtains, for example, they may not fit on thinner rods.
Optimizing Privacy and Light Control: Fine-Tuning Your Window Treatments
Beyond the mechanics of hanging curtains, you may encounter issues with privacy or light control. Fortunately, there are several easy fixes:
-
Blackout Liners for Maximum Darkness: If you need complete darkness in a room, consider adding blackout liners to your existing curtains. These liners attach to the back of your curtains and block out virtually all light. They are available in various sizes and attachment methods.
-
Double Rods for Layering: For greater flexibility in light control and privacy, install double curtain rods. This allows you to layer sheer curtains with heavier drapes. During the day, you can use the sheer curtains for privacy while still letting in natural light. At night, you can close the drapes for complete privacy and darkness.
-
Adjusting Curtain Placement: Sometimes, simply adjusting the height or width of your curtain placement can improve privacy and light control. Experiment with different positions until you find the optimal arrangement.
By addressing these common curtain-hanging problems, you can ensure that your window treatments look their best and provide the privacy and light control you need. Don't be afraid to experiment and make adjustments until you achieve the perfect result.
Having addressed common curtain-hanging mishaps, it's time to shift our focus to the long game. Achieving that flawless drape is just the beginning. To truly maximize your investment and keep your curtains looking their best for years to come, diligent maintenance is key. This section will delve into the essential practices that will safeguard your window treatments and ensure they continue to elevate your apartment's aesthetic.
Maintaining Your Curtains and Hardware: Long-Term Care
Curtains are more than just window coverings; they're an investment in your apartment's aesthetic and comfort. Neglecting their care can lead to premature wear, faded colors, and a generally lackluster appearance. Just like any other valuable asset in your home, curtains and their accompanying hardware require regular attention to maintain their beauty and functionality over time.
Curtain Cleaning: A Key to Longevity
Regular cleaning is arguably the most important aspect of curtain maintenance. Dust, allergens, and everyday grime accumulate over time, dulling the fabric's vibrancy and potentially causing damage. The frequency and method of cleaning will depend on the fabric type and the level of soiling.
Vacuuming for Routine Dust Removal
For routine maintenance, vacuuming is your best friend. Use the brush attachment on your vacuum cleaner to gently remove surface dust and debris from both sides of the curtains. Pay particular attention to the top of the curtains, where dust tends to accumulate. Vacuuming every two weeks can significantly extend the life of your curtains.
Washing and Dry Cleaning: Deep Cleaning Options
When vacuuming isn't enough, it's time for a deeper clean. Always check the care label before washing or dry cleaning your curtains.
Machine-washable curtains can be laundered according to the manufacturer's instructions. Use a gentle cycle, cold water, and a mild detergent. Avoid overloading the washing machine, as this can damage the fabric. Tumble dry on low heat or, ideally, hang them to dry to prevent shrinkage.
For delicate fabrics like silk or velvet, dry cleaning is usually the best option. Find a reputable dry cleaner who has experience with curtains. Be sure to point out any stains or problem areas.
Hardware Maintenance: Preventing Sagging and Failure
Curtain rods and hardware are just as important as the curtains themselves. Over time, screws can loosen, wall anchors can fail, and rods can start to sag. Regular maintenance can prevent these issues and ensure that your curtains remain securely and attractively hung.
Checking and Tightening Screws
Periodically inspect the screws that hold the curtain rod brackets to the wall. If you notice any loose screws, tighten them with a screwdriver. Loose screws can cause the brackets to become unstable, leading to sagging or even complete failure.
Reinforcing Wall Anchors
If you've used wall anchors to install your curtain rods, check them regularly for signs of wear or damage. If an anchor feels loose or wobbly, replace it with a new one. Consider using heavier-duty anchors for added security, especially if you have heavy curtains.
Lubricating Rods and Rings
To ensure smooth operation, lubricate the curtain rod and rings periodically. A silicone-based lubricant works well for this purpose. Apply a small amount of lubricant to the rod and rings, and then slide the curtains back and forth to distribute it evenly. This will help prevent the rings from sticking or squeaking.
Proper Curtain Storage: Protecting Your Investment
When seasons change, or you simply want to refresh your décor, you may need to store your curtains. Proper storage is essential to protect them from dust, moisture, and pests.
Cleaning Before Storage
Before storing your curtains, always clean them thoroughly. This will remove any dust, dirt, or stains that could attract pests or cause damage over time.
Folding and Packing
Fold your curtains neatly and place them in a breathable storage bag or container. Avoid using plastic bags, as they can trap moisture and lead to mildew. You can also add some cedar chips or lavender sachets to the storage container to repel moths and other pests.
Choosing the Right Storage Location
Store your curtains in a cool, dry place away from direct sunlight. Avoid storing them in damp basements or hot attics, as these environments can damage the fabric. A closet shelf or storage bin under the bed are good options.
Video: Hang Curtains Like a Pro: Apartment Edition!

Hanging Curtains Like a Pro: Apartment Edition - FAQs
Here are some frequently asked questions to help you successfully hang curtains in your apartment and achieve that professional look.
Can I really hang curtains in an apartment without damaging the walls?
Yes! Absolutely. The key is using renter-friendly methods like tension rods, command hooks, or lightweight curtain rods installed with easily removable adhesive strips. This allows you to hang curtains in an apartment without leaving permanent marks when you move out.
What if my apartment windows are an unusual size or shape?
No problem. For unique window sizes, consider custom-made curtains or adjustable curtain rods. Tension rods are particularly useful for odd-shaped windows because they fit snugly within the frame. Learning how to hang curtains in an apartment with odd-sized windows requires flexibility and creative solutions!
How high above the window should I hang my curtain rod?
Generally, hanging the curtain rod higher than the window frame creates the illusion of larger windows and a taller ceiling. A good rule of thumb is to hang the rod 4-6 inches above the window frame. This technique dramatically improves how to hang curtains in an apartment, making the space feel more open.
What type of curtains are best for privacy in an apartment?
For optimal privacy, opt for blackout or room-darkening curtains. These fabrics are tightly woven and block out most of the outside light. They not only provide privacy but also help regulate room temperature and reduce noise. Deciding what curtains to use is part of how to hang curtains in an apartment for maximum impact.
So, there you have it! Hopefully, this gives you a good starting point for how to hang curtains in an apartment. Now go give your windows some love and transform your space!